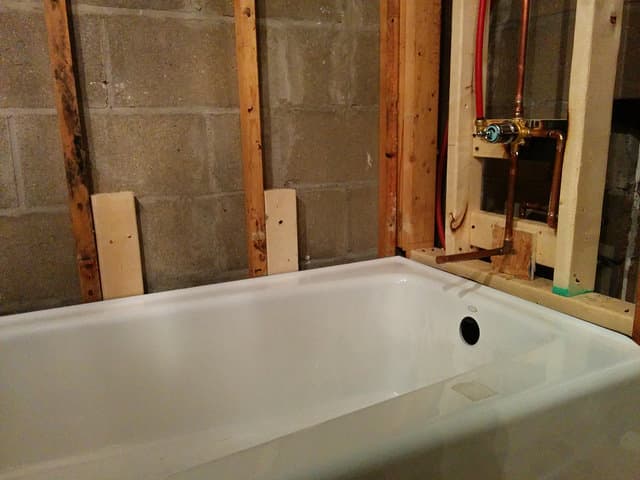
Cast iron tubs are not lacking in the charm department and, as an added bonus, they are extremely durable. However, they will eventually need to be replaced or simply removed. Since these tubs are very sturdy, they can be quite complicated to dismantle, given that they are generally very heavy and firmly built.
So, have you been roaming with the idea of dismantling your cast iron tub without the help of a professional? Hear the warning bells; this is no easy task! Nonetheless, there is a foolproof way to go about it that will allow you to dismantle your bathtub, safely and efficiently.
Security Measures to Uphold When Dismantling the Tub
First things first: To work safely, protect your body, hands, and face. This method may create small sparks or shards that can result in injuries. Also, a loud noise will be generated over a short period of time, so by all means, protect your ears as well.
Ensure that the tub’s surroundings are also covered or removed (storage cabinet, bath mat, laundry basket, etc.).
Step-by-Step Cast Iron Tub Removal
The method that will subsequently be described entails breaking apart the tub into pieces. As a matter of fact, should you wish to keep the tub intact, it is then best to contact an expert in the matter, as they will have to appropriate tools and resources to effectively perform this task without damaging the tub.
Cast iron is an extremely heavy and resistant material. When it comes to cutting it into various pieces, it will not be done easily! One must have the right tools in order to tackle this job, like a sledgehammer or a claw hammer.
Note that the following instructions are provided assuming the plumbing has been disconnected and any obstructions removed.
If the bathtub is lined with sealant, start by removing it with a small X-ACTO-like knife. Be extra diligent when manoeuvring the knife as the silicon caulking can get stuck or might break apart into smaller pieces.
Once this step has been completed, you can now start breaking apart the tub with a sledgehammer. There are no specific guidelines as to how to proceed. Generally, people start with an outer portion of the frame. Repeatedly hit the cast iron with the sledgehammer (or the claw hammer) until the material breaks apart. Then, keep going with the rest of the tub.
To complete the job, you will need to unscrew the drain attached to the plumbing, which is located underneath the tub. Then, you can complete the dismantling and proceed with the next step: cleaning up.
Should you want to try out this method, ensure to place a cover over the tub before hitting the sides. That way, the cast iron shards will remain under the cover as opposed to flying everywhere in the bathroom.

Photo: Flickr-Tess Dixon
Steps to Follow to Keep Your Cast Iron Tub Intact
It is definitely possible to move the tub without damaging it. However, you will need to call on several strong friends! A cast iron bathtub can weigh up to 500 pounds and although the weight is well distributed, the bathroom door is often too narrow for the tub to fit through without angling it.
Before moving it, you will need to remove the silicone gasket and rip out the fasteners that secure it to the wall.
Disposing of Cast Iron Tub or Tub Debris
If the bathtub is still intact, you can sell it online, as there surely will be someone who is willing to buy it at a low price. Otherwise, the debris or the entire bathtub can be disposed of in a responsible and eco-friendly manner at your nearest ecocentre.
Cover photo: Flickr-Brian
Get 3 renovation quotes to dismantle your cast iron tub
RenoQuotes.com will put you in contact with 3 reliable contractors for your cast iron tub renovation project. Fill in the form on our homepage (it only takes a few minutes), and you will receive quotes from trusted professionals.
Dial 1-844 828-1588 to speak with one of our customer service representatives.
Looking for something else?
Related articles
The latest industry news, interviews, technologies, and resources.

Editorial Team
•08 Nov 2023
The floors of the foyer are easily the most beat up thanks to our harsh Canadian winters that have us tracking slush and mud inside. Since this is the room used to remove boots, shoes and other outerwear, it is important to make sure the life of your floors is extended as long as possible.
Editorial Team
•05 Sep 2024
Cracked grout, recessed joints, and loose tiles are some of the telltale signs of a leak, but when grout joints darken as a result of mould, and the tiles sink to the touch, it’s about time to act.
Editorial Team
•01 May 2026
The sheer size of a home's plumbing system can make plumbing issues seem rather complex. There are pipes in the basement, drains outside, bits of pipe coming out on the roof, valves, and J-bends under the sinks...
Cynthia Pigeon
•19 May 2026
In Canada, the cost of interlocking paver installation generally ranges from $150 to $350 per square metre, or about $15 to $35 per square foot. In Quebec, prices often fall within the same range, especially for turnkey residential projects that include excavation, granular base preparation, paver installation, and labour.
Editorial Team
•10 Apr 2020
Have you outgrown the current look of your bathroom? With the passing years, wear and tear will naturally leave its mark, so it’s quite normal to aspire to a change of scenery.