
When it comes to the different components of a roof, most are familiar with and recognize the importance of fascias, soffits, or flashings, but what about drip edges?
Get Your Project Started Today
Submit your details and receive three free quotes from trusted contractors.
Despite being relatively unheard of, they play an important part in protecting the roof and shingles. Learn everything you need to know about them down below.
What's a drip edge and what's its purpose?

Source: Canva
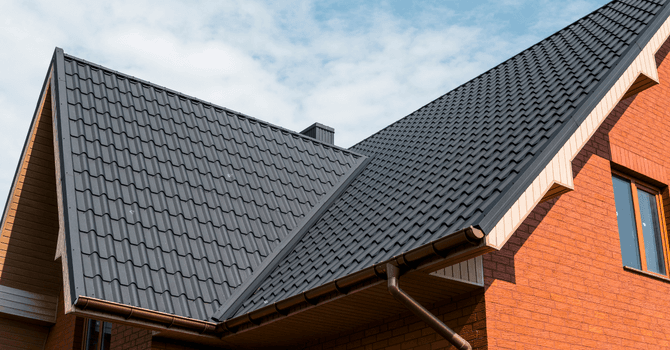
Basically, a drip edge is a metal flashing (usually L-shaped) that's installed on the edges of a roof. Also known as “drip edge flashing” or “D-metal,” it's used to keep water away from the edge of the eaves and channel it toward the gutter. Otherwise, the roof water would flow between the fascia and gutter and ultimately back up under the shingles.
Besides this function, the roof drip edge also prevents the side effects of strong winds in the event of adverse weather conditions. It goes without saying that during such circumstances, the wind blows the water on the roof in every direction. As a result, rainwater will most likely flow down the roof with greater difficulty.
This is when the drip edge will come into play: As soon as water hits its edge, it'll automatically follow the roof’s slope instead of spreading across the rooftop. However, for the drip edge to fulfill its purpose, its lower flange must be between 2 to 4 inches and placed away from the roof.
Are drip edges mandatory?
Should you look over the edge of your roof, you might not even notice the drip edge. In fact, a lot of houses that aren't newly built are devoid of drip edges. Even if according to most building codes across North America, it's a mandatory component, it isn't always an added feature.
All the while, it's important to note that adding drip edges is strongly recommended by experienced roofers and roofing shingle manufacturers.
Manufacturing Materials

Source: Canva
As we've already mentioned in this article, roof drip edges are most often metal sheets. However, they can also be made of plastic, vinyl, or fibreglass.
However, it's preferable to use plastic drip edges for doors or windows, and metal ones for your roofing due to their substantial durability and resistance. It's also worth noting that one should opt for corrosion-proof or galvanized models.
Specifically, metal drip edges can be made of copper, galvanized steel, or aluminum. To help you make the right decision when it comes to choosing the material, note that it's often preferable to opt for galvanized steel or copper drip edges as the aluminum ones tend to be less resistant than the previously mentioned models, even though they're not as susceptible to rust.
Should you choose a copper drip edge, for it to be wholly effective, it should be at least 0.69 mm thick. On the other hand, if you land on galvanized steel drip edges, opt for a 24 gauge.
The Three Available Drip Edge Profiles
Source: Canva
Moving on to the different profiles available now that we've thoroughly examined the different types of materials used to make drip edges. Three are at your disposal (types C, D & F), see below:
Type C: This is the classic L-shaped model, bent at a 90-degree angle. It has a lower flange at the bottom.
Type D: This model is shaped like a “T” and has a lower flange at the bottom. This type is especially preferred for its capacity to keep water away from the fascia.
Type F: This model differs from the other two due to its longer leading edge. This feature makes it a sensible choice when installing over existing shingles.
Besides the three previously mentioned models, it's still worth noting that there's a fourth type of drip edge: the J-shaped one. However, this one isn't as prevalent when it comes to its use on roofs as it's more adapted for window and door use.
Should you be needing more information regarding your roof renovations, check out the following articles:
Looking for something else?
Related articles
The latest industry news, interviews, technologies, and resources.
Cynthia Pigeon
•24 Apr 2026
In 2026, the illusion of a low-cost fixer-upper is colliding with the reality of persistent material inflation and stricter insurance requirements. For major renovation projects, experts now generally recommend a 25% contingency fund—up from the traditional 10%. The most critical hidden costs include structural stabilization ($20,000 to $45,000) and full electrical rewiring ($18,000 to $32,000), which has become a non-negotiable requirement for many Canadian insurers when dealing with older properties.

Editorial Team
•26 Apr 2024
Foul smells, poorly draining water, loud and strange pipe noises, overflowing content… Septic tanks rely on a system that’s more susceptible to damage than a municipal sewer network, so you have to be mindful of how waste is disposed of and pay special attention to the slightest warning sign that there might be an issue with the system.

Editorial Team
•08 Nov 2023
The idea of renovating your house can sometimes spring up at an unexpected moment. Next thing you know, you find yourself browsing the internet looking for inspiration on Pinterest. However, if you're renting your apartment, it could be difficult to start any renovation projects. The final decision will be up to your landlord if you need to make any major changes to your space.

Editorial Team
•19 Jun 2024
Warm summer temperatures come as a major hurdle for all construction workers. With increasingly warm days, and humidity added into the mix, the risks associated with heat-related illnesses, such as heat stroke, become growing concerns for employers and workers. This potentially fatal hazard mandates awareness and appropriate preventative measures to ensure the safety and well-being of construction workers.
Editorial Team
•08 Nov 2023
As with all structural aspects of your home, wear and tear happen. Whether it’s a result of age, weather conditions, or a sudden incident, it’s important to be flexible and prepared when approaching necessary home renovations.