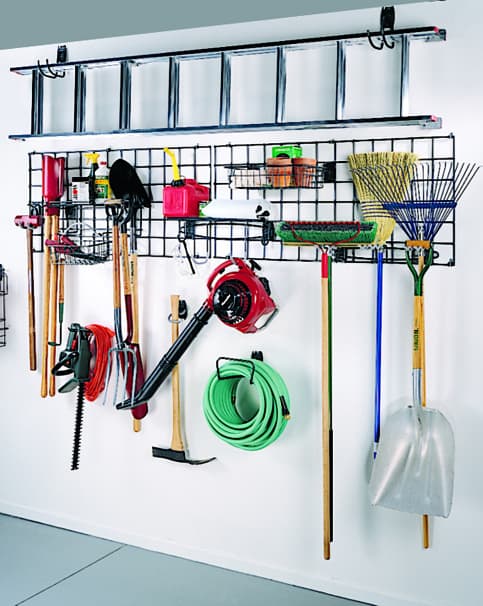
The garage is a multipurpose room that has the potential to serve several functions. With lots of homeowners using this space to hold items that aren't exactly necessary for everyday use, it's important to think about how storage can be created to maximize the potential of this room.
Maybe you've considered it but you're unsure about how to move forward in building your dream shelving unit? Well, look no further! Lucky for you, RenoQuotes.com has created a step-by-step guide to help you get that project actualized!
Here are the straightforward steps on how to install a shelving until in your garage!
Plan and Clear Away Garage Clutter:
Before you start building, it is important to ask yourself a few questions: where would the shelves be best placed? what needs to happen for them to go there? and what will be stored on them? Consider these questions before you begin gathering materials, as you will need to clear away any clutter from the area.
Also to consider is the equipment you will be working with. What is needed for installation? First, buy the appropriate wall anchors and standards from your local hardware store: plastic for thin walls and metal for thicker walls. If the walls are made of cinderblocks, you’ll need a lead anchor to grip screws. If you're unsure about the correct materials, then make sure to consult a professional!
Other things that you will need would be: butterfly bolts, a stud finder, a level, a pencil, the shelves themselves and potentially even the help of a second person! The more properly planned the project is, the smoother it will proceed, so make sure to take as much organizational time as you need.
Measure Area and Shelves:

source: Flickr, Kevin Towler
Next, measure out where the shelves will go on the wall, making sure to also measure the length of the shelf you are planning to install. Are you designing your own shelves or purchasing pre-designed ones? Keep in mind the distance that you'll want between shelves, as well as the weight and height of what will be sitting on them. Regardless, all measurements need to be carefully considered for your shelving project to go over without a hitch!
Gather and Mark:
Now it's time to gather all materials and mark the location for your standards. Standards are the structure that will hold the shelves in place on the wall, so make sure they're sturdy enough to support the weight of your shelving material. Also, it is important to allow at least 8” of overhang on the outside of each standard so that the shelf will not sit directly on the edge of brackets. Use a stud finder to locate wall studs, as this will be where you can attach the brackets to support shelves.
Next, mark and insert standards and anchors. Refer to your original plan and mark accordingly. Use a level with the first standard, and make sure it is level horizontally and plumb vertically. Hold a pencil inside of one of the screw holes to mark the spots for wall anchors. Remove the standard from the wall, use a drill and screwdriver to insert anchors at the spots you’ve marked.
Insert Shelf Standards!
Now it's time to attach the standards! Hold a standard in place over the anchors, and make sure it’s level and plumb. Next, insert the screws through the standard slots and into the anchors. Now, screw into place, making sure to double check spacing between standards as you move. Finally, the fun part, it's time to insert the shelf brackets.
Insert brackets into appropriate slots on the standards, tap in with a hammer or secure the shelf in with screws and voila! Now, you should have a beautiful shelving unit, tucked away from the rest of the house but still potentially impressive enough for you to bring guests into your garage!
Get 3 renovation quotes for your garage shelving project
RenoQuotes.com can help you get quotes for your garage shelving project. If you submit your project to us, we’ll put you in contact with 3 qualified professionals. Fill out the form on our homepage (it only takes a few minutes), and you will receive quotes from trusted renovation specialists.
Dial 1-844 828-1588 to speak with one of our customer service representatives
Looking for something else?
Related articles
The latest industry news, interviews, technologies, and resources.

Cynthia Pigeon
•03 Sep 2026
Buying or selling a residential property in Quebec—whether it is a suburban bungalow, a century-old home, or a condo in Montréal—is one of the biggest financial transactions most people will make. During a real estate transaction, discovering renovations that were completed without municipal approval can raise serious concerns.
Editorial Team
•11 Nov 2024
Although wood as a material is very durable, it still requires tender love and care to maintain its condition. For this reason, if you have a large amount of wood in your home, it would be important for you to understand how to care for it. More specifically, if the structural elements of your home are made from wood, then it will need regular upkeep in order to stay in shape.

Cynthia Pigeon
•10 Jun 2026
Gaining more living space is a priority for many Quebec homeowners. Whether you want to welcome a new child, create a comfortable home office, or add a sun-filled solarium, a home addition is an excellent option. However, the idea of having your yard torn up by heavy machinery and pouring tons of concrete can discourage many homeowners.

Editorial Team
•08 Oct 2025
A home or building with a flawless plumbing system is a serious luxury. The repair of these systems and fixtures isn’t carried out by just any individual. Plumbers are in charge of keeping water flowing smoothly. Plumbing is an underrated profession, and the necessity of plumbers in modern-day society is growing more and more significant.

Editorial Team
•08 Nov 2023
Ready to whip yourself back into shape? If the thought of leaving your house to work out is enough to turn you off the idea completely, yet you happen to have an empty bedroom, why not turn it into a gym?